Securely Connect Remote IoT P2P SSH Ubuntu Example: Your Ultimate Guide
Connecting remote IoT devices using P2P SSH on Ubuntu might sound intimidating, but trust me, it’s simpler than you think. Whether you’re a tech enthusiast or a professional looking to enhance your network security, this guide will walk you through every step. From setting up SSH to securing your connections, we’ve got you covered. So, buckle up and let’s dive into the world of IoT and secure connections!
Imagine this: You’re managing a fleet of IoT devices spread across different locations, and you need a secure way to connect to them remotely. Sounds like a challenge, right? Well, it doesn’t have to be. With SSH (Secure Shell) and Ubuntu, you can establish a robust, encrypted connection that keeps your data safe and your devices under control.
Before we jump into the nitty-gritty, let’s clear something up. This isn’t just another tech article. We’re here to break down complex concepts into bite-sized chunks so you can focus on what matters—getting your IoT devices up and running securely. So, if you’re ready to level up your networking game, keep reading!
- Why Videos Are The Future Of Content A Deep Dive Into Their Power And Impact
- Hdhub4u Movies Free Download The Ultimate Guide To Streaming And Downloading Movies
Why Securely Connect Remote IoT Devices Matters
In today’s hyper-connected world, securing your IoT devices is more important than ever. Think about it—these devices are often the weakest link in your network. Hackers are always on the lookout for vulnerabilities, and an unsecured connection is like leaving the front door wide open. By using SSH on Ubuntu, you can protect your data and maintain control over your devices.
Here’s the deal: SSH isn’t just about remote access. It’s about creating a secure tunnel that encrypts your data and prevents unauthorized access. When you’re dealing with IoT devices, this level of security is non-negotiable. Not only does it protect your devices, but it also ensures the integrity of the data they collect.
Understanding SSH and Its Role in IoT
SSH, or Secure Shell, is a cryptographic network protocol that allows you to securely access remote devices. It’s like a digital lock that only you have the key to. When you use SSH for IoT devices, you’re creating a secure channel that encrypts all communication between your device and the server.
- Talissa Smalley Understanding The Controversy And Setting The Record Straight
- Sam Heughan Kids Exploring The Life And Legacy Of The Outlander Star
- SSH encrypts data, making it unreadable to anyone who intercepts it.
- It authenticates users, ensuring only authorized individuals can access the device.
- SSH provides a secure way to transfer files, execute commands, and manage devices remotely.
For IoT devices, SSH is a game-changer. It allows you to manage your devices from anywhere in the world without compromising security. And when you pair it with Ubuntu, you get a powerful combination that’s both reliable and easy to use.
Setting Up SSH on Ubuntu: Step-by-Step Guide
Now that you understand why SSH is essential for IoT devices, let’s talk about how to set it up on Ubuntu. Don’t worry—it’s not as complicated as it sounds. Follow these simple steps, and you’ll have SSH running in no time.
Installing SSH on Ubuntu
The first step is to install the SSH server on your Ubuntu machine. Here’s how you do it:
- Open your terminal. You can do this by pressing
Ctrl + Alt + T. - Type the following command and hit Enter:
sudo apt update. - Next, install the SSH server by typing:
sudo apt install openssh-server. - Once the installation is complete, verify that SSH is running by typing:
sudo systemctl status ssh.
That’s it! You’ve successfully installed SSH on your Ubuntu machine. Now let’s move on to configuring it for remote access.
Configuring SSH for Remote Access
With SSH installed, it’s time to configure it for remote access. This step is crucial if you want to connect to your IoT devices from anywhere in the world.
Editing the SSH Configuration File
To configure SSH, you’ll need to edit the SSH configuration file. Here’s how:
- Open the SSH config file by typing:
sudo nano /etc/ssh/sshd_config. - Look for the line that says
#Port 22and change it to a different port number. This makes it harder for hackers to find your SSH connection. - Find the line that says
PermitRootLogin yesand change it toPermitRootLogin no. This prevents root login, adding an extra layer of security. - Save the file and exit by pressing
Ctrl + X, thenY, andEnter. - Restart the SSH service by typing:
sudo systemctl restart ssh.
By making these changes, you’re ensuring that your SSH connection is both secure and efficient. Now let’s talk about securing your SSH keys.
Securing SSH Keys for IoT Devices
One of the best ways to secure your SSH connection is by using SSH keys instead of passwords. This method is more secure and convenient, especially when dealing with multiple IoT devices.
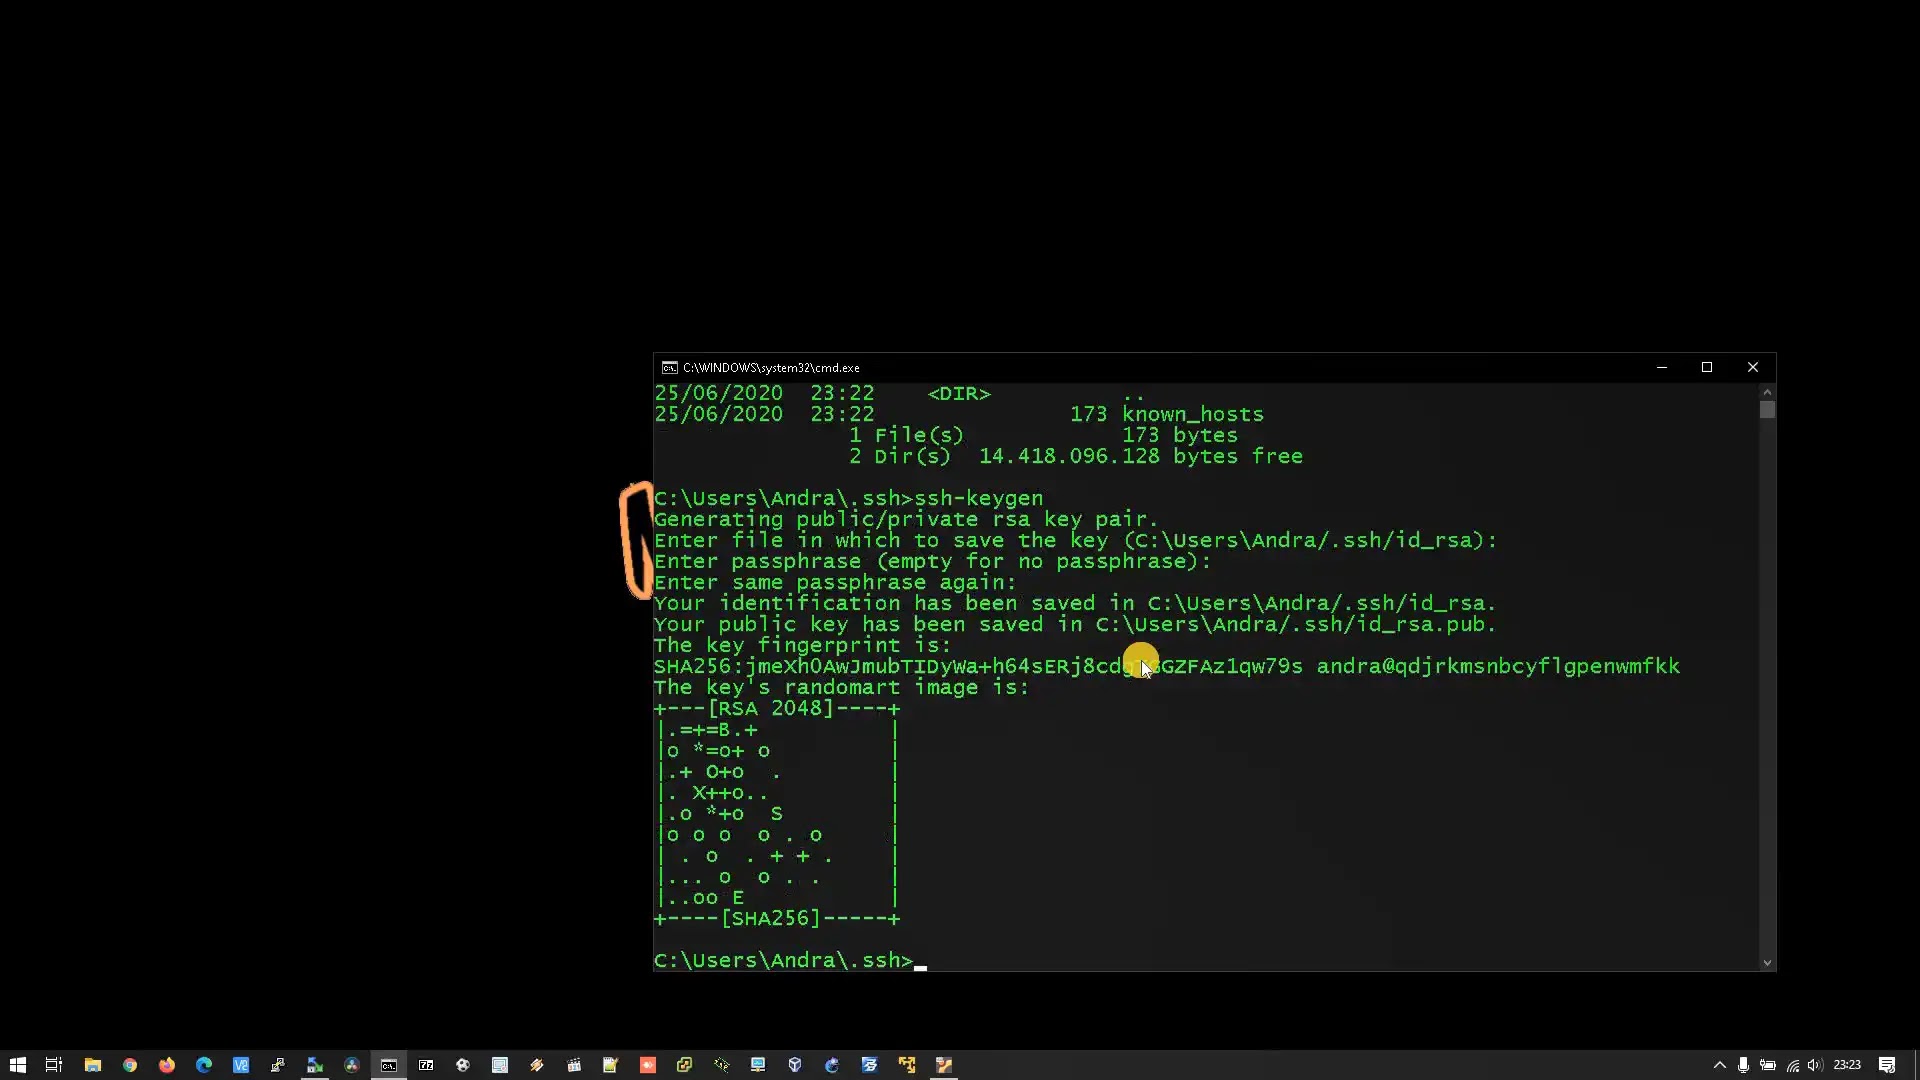
Generating SSH Keys
Here’s how you can generate SSH keys on your Ubuntu machine:
- Open your terminal and type:
ssh-keygen -t rsa -b 4096. - When prompted, press Enter to save the key in the default location.
- Enter a passphrase when asked. This adds an extra layer of security to your key.
Once your keys are generated, you’ll need to copy the public key to your IoT device. You can do this by typing: ssh-copy-id user@remote_device_ip. Replace user with your username and remote_device_ip with the IP address of your IoT device.
Connecting IoT Devices with P2P SSH
Now that your SSH server is set up and secured, it’s time to connect your IoT devices using P2P SSH. This method allows you to establish a direct connection between devices without relying on a central server.
Setting Up P2P SSH
Here’s how you can set up P2P SSH for your IoT devices:
- Ensure both devices have SSH installed and configured.
- Exchange public keys between the devices. You can do this manually or by using a script.
- Test the connection by typing:
ssh user@remote_device_ip.
With P2P SSH, you can manage your IoT devices directly, reducing latency and improving efficiency. It’s like having a private network just for your devices.
Best Practices for Securely Connecting IoT Devices
Setting up SSH is just the beginning. To ensure your IoT devices remain secure, you need to follow some best practices. Here are a few tips:
- Regularly update your Ubuntu system and SSH server to patch any vulnerabilities.
- Use strong, unique passwords for your devices and avoid reusing them.
- Monitor your SSH logs for any suspicious activity. You can do this by typing:
sudo tail -f /var/log/auth.log. - Limit the number of failed login attempts by installing tools like Fail2Ban.
By following these best practices, you can minimize the risk of unauthorized access and keep your IoT devices safe.
Common Challenges and Solutions
As with any technology, there are challenges you might face when setting up SSH for IoT devices. Here are some common issues and their solutions:
Connection Issues
If you’re having trouble connecting to your IoT device, here are a few things to check:
- Ensure that the SSH service is running on both devices.
- Verify that the IP addresses are correct and reachable.
- Check your firewall settings to make sure they’re not blocking the connection.
Security Concerns
Security is always a top priority when dealing with IoT devices. To address security concerns:
- Use SSH keys instead of passwords for authentication.
- Disable root login and create separate user accounts for each device.
- Regularly audit your SSH configuration to ensure it’s up to date.
By addressing these challenges head-on, you can ensure a smooth and secure connection for your IoT devices.
Case Studies: Real-World Examples
To give you a better idea of how SSH works in real-world scenarios, let’s look at a few case studies:
Case Study 1: Smart Home Automation
A homeowner wanted to remotely manage their smart home devices using SSH. By setting up an Ubuntu server and configuring SSH, they were able to control their lights, thermostats, and security cameras from anywhere in the world.
Case Study 2: Industrial IoT
A manufacturing company used SSH to securely connect their IoT sensors to a central server. This allowed them to monitor production in real-time and make data-driven decisions.
These examples show how versatile and powerful SSH can be when applied to IoT devices.
Conclusion: Take Action Today
Securing your IoT devices with SSH on Ubuntu is a smart move that can save you time, money, and headaches in the long run. By following the steps outlined in this guide, you can establish a secure, reliable connection that keeps your data safe and your devices under control.
So, what are you waiting for? Start setting up SSH today and take the first step towards a more secure IoT network. And don’t forget to share this article with your friends and colleagues who might find it useful. Together, we can make the world of IoT a safer place!
- Jasmine Sherni Videos A Comprehensive Guide To Her Content And Influence
- Hdhub4uspa Your Ultimate Guide To Premium Spa Experiences

How To Securely Connect Remote IoT Devices Using P2P SSH On Ubuntu
How to remote SSH to Ubuntu Server 20.04 root Without Password Using
Securely Manage Your WisGate Connect Remotely SSH No Ports
